How to Propagate Big Daddy Hydrangea From Cuttings
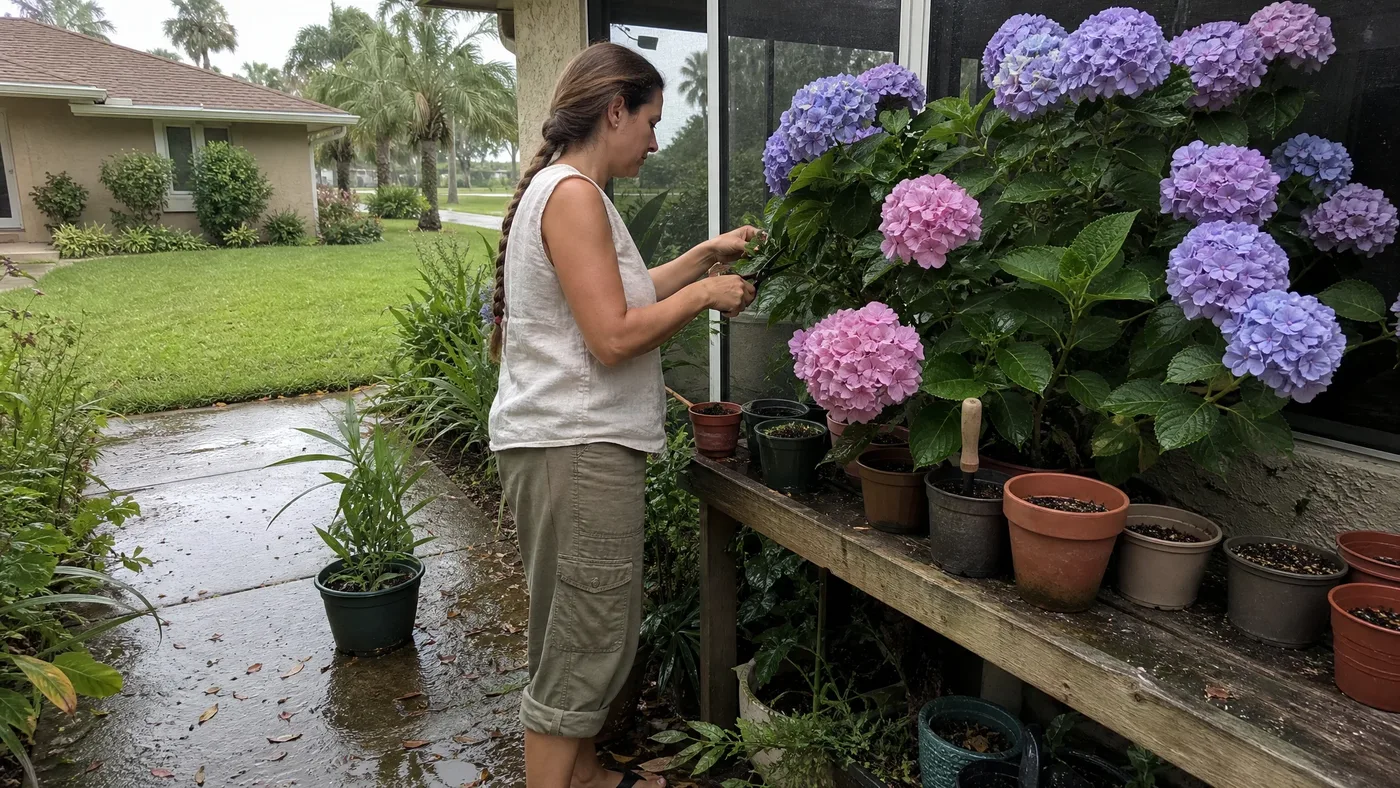
It is a late June morning and you are standing at the patio border, coffee in hand, looking at a Big Daddy heavy with blooms. You want another one for the far side of the yard, and you can see the soft green shoots that would make it. Before you reach for the pruners, know that this is one sequence, from parent plant to potted cutting, and the order matters. Cut first and gather supplies second, and the stems wilt on the bench while you hunt for a pot.
We'll walk you through the setup and the best window for cutting, then the cut, the leaf trim, the potting and the humid weeks of rooting, then layering, the patent rules and planting out. Follow the steps in order and one healthy shrub can give you a few new plants for the same border.
Setting Up for Big Daddy Hydrangea Cuttings
Everything below should be on the bench before the first stem comes off the plant. Cut stems lose water fast, so preparation is the whole job.
Tools and Supplies
Gather this checklist first, and wash everything you will touch with soapy water.
- Sharp pruners or a razor knife, cleaned so you do not carry disease from one stem to the next.
- A clear plastic bag or a dome large enough to cover the pots without touching the leaves.
- Small pots with drainage holes, one per cutting.
- A light, fast-draining rooting mix, premoistened so it holds together in your hand.
- Rooting hormone powder or gel, poured into a separate dish.
- A pencil or dibble for making holes, and plant labels.
- A bucket of water or a zip bag with a damp paper towel for the cut stems.
The Best Window for Cutting
Timing decides whether the stems have the right texture, and that matters more than any other choice you make.
The University of Georgia says bigleaf hydrangea can be propagated from softwood cuttings taken in early summer. For Big Daddy in most gardens, that means the weeks when the new shoots are full-sized but still bend before they snap. Colder zones reach that stage later, so check with your local extension service for your dates.
Water the parent plant well the day before, and cut in the cool of the morning when the stems are full of moisture. Our FAQ touches on cuttings briefly, and this guide is the full walkthrough.
Cutting the Stems at the Right Node
This step sets your odds. A cutting from the right shoot, cut in the right spot, roots faster and stays healthier.
Choose the Right Shoot
Pick shoots from this year's growth that carry no flower head. The Georgia guide says to select terminal cuttings from non-flowering shoots, meaning the growing tip of the stem. Skip anything thin, spindly or shaded to a pale green. A sturdy stem with big, dark, firm leaves is what you want.
Make the Cut
Now take the stem itself, working quickly and keeping each piece out of the sun.
Each cutting should be 3 to 5 inches long with at least 3 leaves. Make the cut just below a node, the point where a pair of leaves attaches, and cut at a slight angle. Drop each cutting straight into your bucket or damp bag, and label them if you are working from more than one plant.
Take more cuttings than the number of plants you want, because a few will fail. Taking a handful of tips from a mature Big Daddy will not hurt the shrub, though it is worth a look at our pruning guide before you remove stems that carry buds you want to enjoy.
Trimming Leaves and Dipping in Hormone
Big Daddy has large leaves, and large leaves lose water fast. A small trim and a clean dip give the cutting its best chance of rooting.
Trim the Leaves
Strip the lowest pair of leaves, since any leaf that ends up under the mix will rot. Then cut the top half off each remaining leaf with a clean straight cut. This removes much of the surface that loses water while the stem has no roots to replace it. The tip bud and the trimmed leaves stay, and the cutting should still look like a small plant.
Apply Rooting Hormone
Do this at the bench, one cutting at a time, right before potting.
- Pour a little hormone into a separate dish and put the tub away.
- Moisten the bottom inch of the stem if you use powder so it sticks.
- Dip only the cut end, then tap the stem on the dish rim to knock off the excess.
- Pot the cutting right away, before the hormone dries.
Never dip into the original tub. Moisture and disease carry from one stem to the next, and a whole batch can fail from one contaminated container. More hormone does not help, and a thick clump can burn the stem.
Potting Cuttings in a Light Mix
Hydrangea stems rot easily in heavy, wet soil, so the mix and the way you place each stem matter as much as the hormone.
Fill each pot with premoistened mix, to within about a half inch of the rim, and tap the pot on the bench to settle it. Use a peat-based rooting mix cut with perlite or coarse sand, or a commercial seed-starting blend. Do not use garden soil or a plain potting mix, which stay too wet around a stem with no roots.
Poke a hole with the pencil first so the hormone does not rub off, then lower the cutting in until the lowest node sits under the surface. Firm the mix gently around the stem. The remaining leaves should sit above the mix and clear of the pot's edge and of each other, because touching leaves hold moisture and invite mold.
Water lightly from above to settle the mix around the stem, then let the pot drain. One cutting per pot is easier on the roots later than several crowded in a tray, and it means a failed cutting never takes its neighbor with it.
Keeping Humidity Up While Roots Form
For the next few weeks the cutting survives on the water in its leaves and the moist air around them. Your job is to hold both steady.
Light and Placement
Cover the pots with the bag or dome, held off the leaves with a few sticks or a wire hoop. Then put the whole setup in bright shade, never in direct sun. A lot of advice says to give cuttings a bright windowsill, and we disagree. The University of Illinois puts it bluntly: never place new cuttings in the sun, because they will cook in the plastic.
We often see cuttings fail in the first week for exactly this reason, with limp, scalded leaves under a bag on a south-facing sill. A north porch or the shade of a tree is much safer.
How Long Rooting Takes
Expect roots in about 2 to 3 weeks, faster in warm weather. Keep the mix evenly damp, never soggy, and open the bag for a minute every few days to let fresh air in. Remove any leaf that turns yellow or slimy before it spreads rot.
To test for roots, tug a cutting very gently after the second week. If you feel resistance, roots are forming. New leaf growth at the tip is another good sign.
Troubleshooting the Bag
This table lists the problems that show up most often and what to do about each one.
| What you see | Likely cause | What to do |
|---|---|---|
| Wilted, drooping leaves | Too dry, or too much sun | Mist, reseal the bag, move to deeper shade |
| Black, soft stem base | Mix too wet or hormone contaminated | Discard the cutting and ease off watering |
| Gray fuzz on leaves | No airflow | Remove affected leaves and vent the bag daily |
| Green stem, no roots yet | Still working | Wait a little longer, keep it shaded |
Layering as a Slower Option for Big Daddy Hydrangea
If you only want one or two new plants, or you missed the cutting window, layering lets the parent plant do the rooting for you.
Choose a low, flexible limb that reaches the ground. Use a knife to remove a ring of outer bark about 1 inch wide all the way around the limb where it will touch the soil. Pin that spot into a shallow trench and cover it with soil, leaving 6 to 12 inches of the tip growing in the open. Hold the stem down with a bent wire or a flat stone, and keep the soil damp.
The tradeoffs are plain. Layering is gentle and needs no humidity tent or tricky timing, and the limb stays attached to a plant that is feeding it. But it is slow and gives you only a few plants. Done in summer, the new plant is ready to transplant the following winter, according to the Georgia extension. Cuttings give you several plants in weeks, while layering gives you a bigger plant with less fuss.
Check the limb in the fall by scraping a little soil away. If you see roots, cut the new plant free from the parent when it is dormant and move it with a good ball of soil.
Patent Status and Sharing Big Daddy Hydrangea Plants
Before you start giving plants away, you need to know that Big Daddy is a patented plant, USPP14527, and propagating it comes with limits.
What we tell customers is that cuttings and layers from your own Big Daddy are for personal use, in your own garden. The University of Illinois extension reminds readers that reproducing trademarked or patented plants may be prohibited. A plant patent protects the right to reproduce the cultivar, and that covers selling propagated plants, trading them in bulk and starting a side business with them.
One of the most common questions we get is whether it is fine to pass a rooted cutting to a neighbor. Our answer is to keep the extra plants in your own yard and to ask the patent holder before you share or sell anything. That rule is not ours, and the patent covers the plant itself.
If friends want a Big Daddy of their own, the easiest route is to send them to a grower. Our plants arrive rooted and ready to plant, with none of the waiting. Our buying guide covers what to look for.
Moving Rooted Big Daddy Hydrangea Into the Garden
Rooted cuttings are still tender. Moving them from a humid bag to open garden air in one step is the quickest way to lose them.
Harden Off Gradually
Start when roots show at the drainage holes or the plant pushes new leaves. Open the bag a little more each day, then remove it altogether after about a week. Move the pots from deep shade to bright shade, then to a spot with morning sun. Keep watering, because pots this small dry out quickly.
Plant Out and Protect
Pot up into a larger container if it is late in the season, or plant out when the weather is mild and you can water regularly. Bigleaf hydrangea does best in part shade, so give the new plant the same spot you would give a nursery-grown shrub. Our sun guide covers the details and the planting guide covers the hole itself.
In the first winter, young plants are less hardy than mature ones. If you are in the colder end of zones 6 to 9, read our winter care guide before the first frost and mulch the base.
Big Daddy Hydrangea Cuttings, Start to Finish
Gather your supplies, take non-flowering tips in early summer, trim the leaves, dip in hormone, pot in a light mix and keep the pots humid and shaded for 2 to 3 weeks. Layering is the slower route that asks less of you. Either way, keep the plants for your own garden, since Big Daddy is patented.
Big Daddy Hydrangea
Nursery-grown Big Daddy Hydrangea in sizes from 3 Gallon, shipped to your door.
From $65.85
Shop Now →As the young plants settle in, check for roots at the drainage holes, firm new growth, evenly damp soil, shade from hot afternoon sun and a plan for winter. As a small grower with our own farms, we care about getting propagation right because a stem that roots well becomes a shrub that blooms for years, and we grow and sell top-quality plants so yours can do just that.